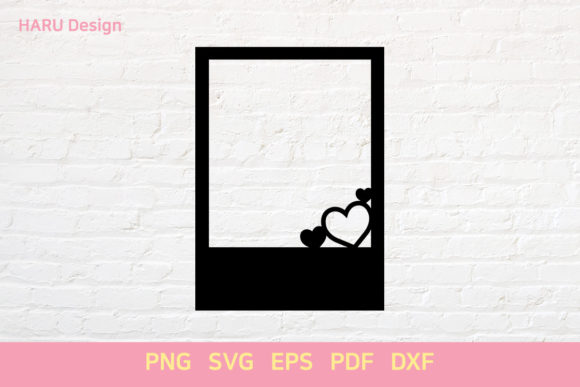
Polaroid Frame: Designer’s Embroidery Project Review
First Look: The Instant Nostalgia of a Polaroid Frame
Opening a design file that carries the shape of a classic Polaroid frame always triggers a specific creative mood. It’s warm, a little retro, and immediately personal. Before I even import it into embroidery software, I can already picture the kind of finished products this graphic will live on — a custom sweatshirt for a new mom, a marketplace tote bag for a handmade shop, or a small batch of baby onesies that feel like keepsakes. The Polaroid Frame isn’t a complex, over-rendered illustration. It’s clean, recognizable, and gives embroidery designers a flexible container for names, dates, tiny motifs, or even a satin stitch “photo” area. As a machine embroidery design concept, its simplicity is its biggest strength.
This isn’t a pre-digitized embroidery file, and that’s important to say right away. What you get is a set of graphic design assets: 1 SVG, 1 EPS, 1 PNG, 1 PDF, and 1 DXF file, all built on a 12×12 inch artboard. That’s a generous starting canvas, and for anyone who digitizes their own work, it’s a very practical collection. The vector formats let you scale the outline without losing quality, and the PNG gives you a quick preview for mockups. As a reviewer who spends hours testing how designs translate from screen to stitch, I appreciate that the Polaroid Frame arrives as a clean, flat graphic. It leaves the digitizing decisions entirely in your hands, which is exactly what many experienced crafters and small business owners prefer.
Where This Design Shines in Embroidery Projects
The Polaroid Frame’s silhouette belongs to a category of decorative elements that feel both playful and intentional. It’s not a generic border; it’s a storytelling shape. In my own studio, I immediately thought of five or six product categories where this would become a repeatable bestseller. Personalized gifts, for instance, are a natural fit. A name and birth date inside the frame stitched onto a baby blanket or nursery pillow cover takes on a sentimental, first-photo-album quality. For handmade product sellers, a “captured moment” theme builds a consistent brand narrative around family, travel, or pet portraits.
Because the frame is essentially a rectangle with a slightly wider bottom border and rounded inner corners, it works beautifully as an applique design base. You can leave the center open for a contrast fabric, or fill it with a light fill stitch to create a faux photo paper look. The inner area can host a running stitch sketch, a tiny embroidered illustration, or even a simple text lockup. I’ve seen similar concepts used on Etsy for “custom photo frame” patches, and the buyer response is always strong because the product feels like a thoughtful, personal object rather than a mass-produced graphic.
When I think about seasonal demand, the Polaroid Frame also slides easily into holiday embroidery. A small snowflake or a pumpkin motif stitched inside the “photo” area turns a simple tote bag into a seasonal gift. For wedding gifts, a couple’s initials and a date inside the frame stitched onto a tea towel or a pillow cover feels intimate and elegant. The design doesn’t shout; it invites someone to look closer, and that visual quietness is a huge asset in a craft business where customers are looking for items that feel one-of-a-kind.
The Polaroid Frame on Real Garments and Products
Let’s talk about how the Polaroid Frame actually behaves once you translate it into stitches. I ran a mental test on several common products, and the shape holds up remarkably well. On a custom apparel piece like a crewneck sweatshirt, the frame offers a nice, structured focal point. It doesn’t warp around the body because the straight lines and defined corners anchor the embroidery. On a tote bag design, the frame gives you a built-in margin for a name or a short quote, making the whole front panel feel designed rather than just placed.
For baby embroidery, the Polaroid Frame is a quiet winner. Small bodysuits and tiny bibs can handle a scaled-down version of the frame, especially if you digitize the outline with a narrow satin stitch and skip the inner fill. The result is a lightweight, soft-feeling design that won’t irritate sensitive skin. Caps and hats are trickier, but the frame’s simple geometry means you can bend it slightly in your digitizing software to follow the curve of a cap without losing the recognizable Polaroid shape. I’d still recommend testing the warped version on a scrap cap first, though, because the bottom border can distort if you’re not careful with stitch angles.
One unexpected strength is how the Polaroid Frame performs as an embroidered patch. When you digitize the border as a dense satin stitch and leave the center raw, the patch becomes a blank canvas. You can then add a separate name or icon inside with a different thread color. Small shop owners who sell custom patches at craft fairs will find this a versatile, low-risk base product that can be personalized on the spot.
Fabric and Hoop Considerations for a Clean Stitch
Not every fabric will treat the Polaroid Frame kindly, and this is where practical design judgment matters. The 12×12 inch artboard size is generous, but most embroidery machines have smaller standard hoop sizes. I always advise crafters to check whether the design fits their specific hoop before committing to a project. If you need to resize the frame, do it in your digitizing software, not in the embroidery machine, because scaling a stitch file directly can ruin density and pull compensation.
On textured fabric like a thick terry tea towel or a loosely woven blanket, the straight lines of the frame can become wavy if you don’t use enough underlay and a proper stabilizer. A cutaway stabilizer is almost always the right call for these projects. Stretchy fabric — think a ribbed onesie or a performance tee — demands a no-show mesh stabilizer and careful hooping, or the frame’s corners will pucker. For dark fabric, the contrast between the frame and the background becomes critical. A white or light pastel thread on black fabric makes the Polaroid Frame pop, but if the thread is too thin, the white area can look translucent. A double layer of satin stitch or a slightly higher density in the digitizing phase solves that.
Small hoop sizes bring their own challenges. If you’re stitching a two-inch version of the frame for a cuff or a zipper pouch, the inner corners can close up and lose definition. I always run a test stitch on scrap fabric first, checking whether the tiny details read clearly. In many cases, simplifying the inner corner radius by a fraction of a millimeter makes a huge difference in the final finished product.
How the Polaroid Frame Elevates Handmade Products
From a seller’s perspective, the Polaroid Frame is a design that builds customer trust through its familiarity. People recognize the shape instantly, and that recognition triggers a feeling of nostalgia and authenticity. When a buyer sees a product photo of a sweatshirt with a beautifully stitched frame containing a name or a date, they don’t just see a garment; they see a gift for someone they love. That emotional bridge is what turns a browser into a buyer, and it’s surprisingly consistent across product categories.
The handmade product presentation also benefits from the frame’s tidy composition. It gives the embroidery a clear boundary, which makes the whole item look professionally finished. On an Etsy listing page, a thumbnail showing a crisp Polaroid Frame on a neutral tote bag signals that the seller pays attention to detail. The same design on a pillow cover or a kitchen towel creates a cohesive, boutique-brand feel, especially if you use the frame as a recurring design element across your shop.
For digital product sellers who use the graphic files for printable mockups, the included PNG and PDF are immediately useful. You can drop the frame into a product preview image, add a sample name, and show customers exactly what their custom order will look like. That kind of professional preview reduces customer hesitation and returns, and it’s a small but meaningful advantage when you’re competing in a crowded marketplace.
Designer Notes: Digitizing and Testing for Best Results
Because the Polaroid Frame arrives as a graphics file, not a pre-digitized embroidery design, the responsibility for a clean stitch falls on the digitizer. In my own workflow, I always start by importing the SVG into embroidery software, then mapping out the stitch types. The outer border is a natural candidate for a satin stitch; the inner photo area can be a light fill or left empty. If I’m adding text inside the frame, I digitize the lettering first, then place the frame around it, ensuring the text has enough breathing room.
I strongly recommend testing the design on a fabric that matches the final project’s texture and weight. Thread colors can look completely different on cotton versus a polyester blend, and a thread that seems perfect on screen might clash with the garment’s undertone. A quick black-and-white mockup test helps you see whether the frame’s proportions hold up without color distraction. I also check the stitch density in the corners, because sharp turns in a satin stitch can create needle holes or thread breaks if the density is too high.
Stabilizer choice is another make-or-break detail. For a stable woven fabric like a cotton tote, a medium-weight cutaway stabilizer works well. For a thin knit, I add a second layer of water-soluble topping to keep the satin stitches from sinking into the fabric. These small prep steps are what separate a commercial embroidery product that sells repeatedly from one that gets returned or ignored.
A Real-Life Scenario: Custom Tote Bags for a Photographer’s Client
Let me walk you through a scenario that reflects how I’d actually use the Polaroid Frame in a client project. A local photographer asked me to create a set of custom tote bags as thank-you gifts for her wedding clients. The idea was to stitch a small Polaroid frame on one side of the tote, with the couple’s initials and wedding date inside. The frame would act as a signature element, echoing the photographer’s own brand vibe of capturing fleeting moments.
I started by downloading the file set, grateful for the clean SVG and EPS versions. I imported the vector into my digitizing program, resized the frame to roughly 4×4 inches to fit a standard hoop, and digitized the border as a 3mm satin stitch in a soft charcoal thread. The inner “photo” area I filled with a subtle off-white fill stitch, then added the lettering in a warm blush pink. I tested the design on a canvas tote scrap, checking the pull compensation and making sure the corners didn’t warp. The test stitch looked crisp, so I moved to the final bags. When the photographer saw the finished product, she immediately ordered more for her studio’s holiday gift batch. That’s the kind of real-world embroidery project where the Polaroid Frame’s personality shines: it’s personal, professional, and endlessly repeatable.
Final Practical Thoughts Before You Stitch
Before you add the Polaroid Frame to your next product line, take a moment to verify a few practical details. The file set includes vector formats that scale beautifully, but if you’re stitching it commercially, confirm that your embroidery file conversion matches the final dimensions you need. The 12×12 inch artboard is a starting point, not a guarantee that every hoop will fit. Always check your machine’s hoop limits and consider how the design will look when sewn onto a curved surface like a cap or a sleeve.
For small shop owners and Etsy sellers, this design is a low-risk, high-reward addition to your product catalog. It works across seasons, pairs well with personalized text, and the visual impact is immediate. Just remember that the strength of the Polaroid Frame lies in its simplicity. Overcomplicating the inside with overly dense fills or tiny lettering can turn a clean, nostalgic shape into a cluttered mess. Keep the stitch choices deliberate, and let the frame do the heavy lifting.
If you’re undecided, stitch a sample on a simple tea towel or a pillow cover first. See how the light hits the satin stitch, how the fabric holds the corners, and how people react when they see it. The Polaroid Frame is a design that grows on you the more you use it, and once you find the right product pairing, it’s the kind of digital embroidery file concept that keeps customers coming back.